Thursday, April 18, 2013
Bursting at the Seams.
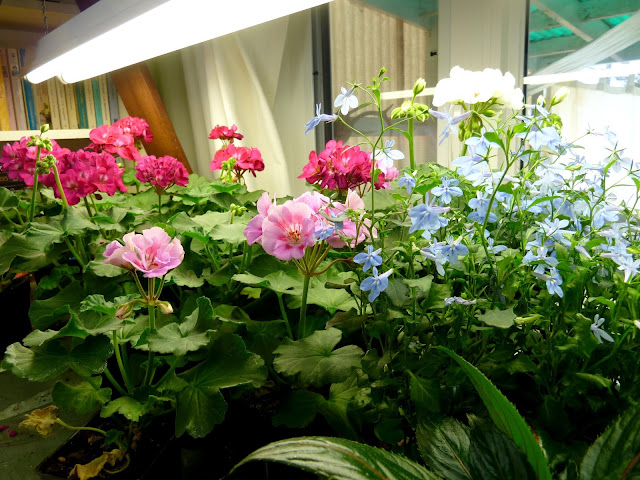
Plants have taken over nearly every corner of the house, not to mention all the other things we've been madly working on for next week's sale.
Things are coming to a head. I was planning to start moving plants into the greenhouse over the next few days but it looks like we're going to have one more very cold night. Since next week's forecast is excellent, Monday is the day.
And not a moment too soon!
Now it's time to get back to work!
Wednesday, March 27, 2013
Planting begonia tubers
My friend Marlene is coming over with her two girls. They will craft and play (at least, we hope they will craft and play) while we transplant what looks like a bazillion seedlings, most of whom have been hanging over the edges of their pots, begging for just a little more room, desperate to stretch out their roots.
So while we spend the day with our hands in dirt I thought I would give you the chance to do the same.
To that end I am reposting this piece I wrote back in the beginning on how to plant up begonia tubers.
Never done this before??? Neither had I . . .and the end result was a beautiful begonia that bloomed all summer. . .
Enjoy.

Quite some time back, I thought I try something new and plant a begonia tuber.


Cover with soil.

Water.
And here, my dear friends, is where I ran into trouble.
I reread the planting directions and saw, in bold, this warning:
-Do not let any water sit in the hollow tuber or it may rot.
What!
Well, I'll fix that!

Ummm, in trying to drain the excess water from the pot, an unfortunate thing occurred.
The tuber fell out!

No problem.
I can put it back.
Hang on. . .

There!
I mixed a little dry soil with the incredibly wet soil.
That should do it!
Now for a quick double check on the proper way to start these guys.
I hop over to Doug green's site. http://www.douggreensgarden.com/
What!
Only water with warm water or the tuber may rot!
Oh for crying out loud!
It also wants bottom heat, so I put it on top of one of my fluorescent lights. (the old ones throw off a lot of heat.)
I have never had to worry about too much water before.
My poor plants generally worry about not having enough water.
So here we are. . .
Six weeks later. . .

Whew!
I can still call myself a gardener.
Tuesday, April 7, 2009
Thursday, September 11, 2008
Serendipity

Remember these?


Saturday, April 19, 2008
Disaster!

 I knew it was going to cool off and that snow was a possibility but. . .
Wednesday, April 16, 2008
Thursday, March 13, 2008
Treasure!
I've been feeling under the weather lately and it finally caught up with me.
So. . .
Without further ado. . .
The treasure!

What is this you ask?
Good question!
My sister T and her husband B were in town for a business seminar.
They are in the greenhouse business and the seminar required a game.
T came up with a game that required the participants to identify the various plant cuttings.
As there were two teams, there were two identical batches of cuttings. Twenty in each.
Guess who got to take the cuttings home?
Yep. ME!
Whoo hoo!
Better than jewelery anytime!
They had to be planted fast though, as they had spent nearly two days in T's carry on bag.
They all seem to be okay so I'll keep you posted.

Here's what one of them looked like in the bag.
Can you guess what this is?

Here it is out of the bag.
Can anyone tell me now?
Did you say million bells?
I did.
I was wrong.
It is a potunia. Have you ever heard of it?
I hadn't. But now I have.
I love new plants!
Here's what my plant shelves looked like before I planted 40 cuttings into 4" pots.

Here's what they look like now!
As you can see I have moved all non essential plants to other locations.
Anyone with any suggestions as to were all the plants I haven't started yet might go?
I'm going to be hanging lights in my bedroom next!
Tuesday, February 26, 2008
Mistake number one
 These are the seedlings in question.
 As you can see I had planted these Datura in a smaller six pack. I planted in the smaller six pack for only one reason. . .
Pure laziness. The smaller pot was brand new and didn't need washing and sterilizing. The larger pot did.
So I choose the smaller one.
And this is the result of my laziness. . .

That's right, flowers! The very small plants have already started flowering. Why you ask?

This is why. The plant has already become a little root bound which is it's signal to flower! If I had transplanted it into a bigger pot earlier it would have just kept growing bigger. Now it's energy is going into the flower.

One of the plants is not as far along as the other so hopefully all is not lost with that one.
Of course the solution is to transplant them now.
Which I did.
But still.
The fact is , is that they won't get as big as they should have!
I hate that.

Time for a bigger pot. Notice how I went quite a bit bigger? This will not happen again! (well. . . yes it will. But I can hope!)

The trick here is to break the roots apart so that they will be forced to grow into the new surrounding soil. If you just leave them they way they are they'll keep circling around, which often causes it to dry out faster, and will it never get as big as it should.

Into the pot it goes.

Add your soil .

Press soil in firmly.

Add water and put back under the lights and that's it.
Really. . .
That's all there is to it!
What else could there be?

Oh all right! You remember the flower buds? Well. . . I have to take them off.
I know, I know, it will be painful. After all who wouldn't want to see the first flower of the season?
But you want the growth to go to the roots, so the plant will get bigger, rather than wasting energy on flowering.
And I'll do it.
But it's going to hurt. . .
Tuesday, February 19, 2008
Time to fertilize!


I use 14-14-14 to fertilize my seedlings and I place one pellet in each corner of the plant cell.


Sunshine, warmer temperatures, and new green growth. . .
Spring is on it's way.


.jpg)


